Setting up fuelGenie card restrictions
It’s simple to manage your fuelGenie cards online and you can easily order replacement cards for free. It’s vital you keep your fuelGenie cards up to date online to avoid your drivers being refused payment when they fill up.
Updating your Vehicle Registration Number (VRN)
Keeping the VRN associated with your fuelGenie cards up to date is vital. If your drivers try to pay for fuel with a fuelGenie card which has a different VRN than the car on the forecourt, they may be refused payment.
Follow the instructions below to change the VRN associated with your fuelGenie cards:
1. Login to your account here.
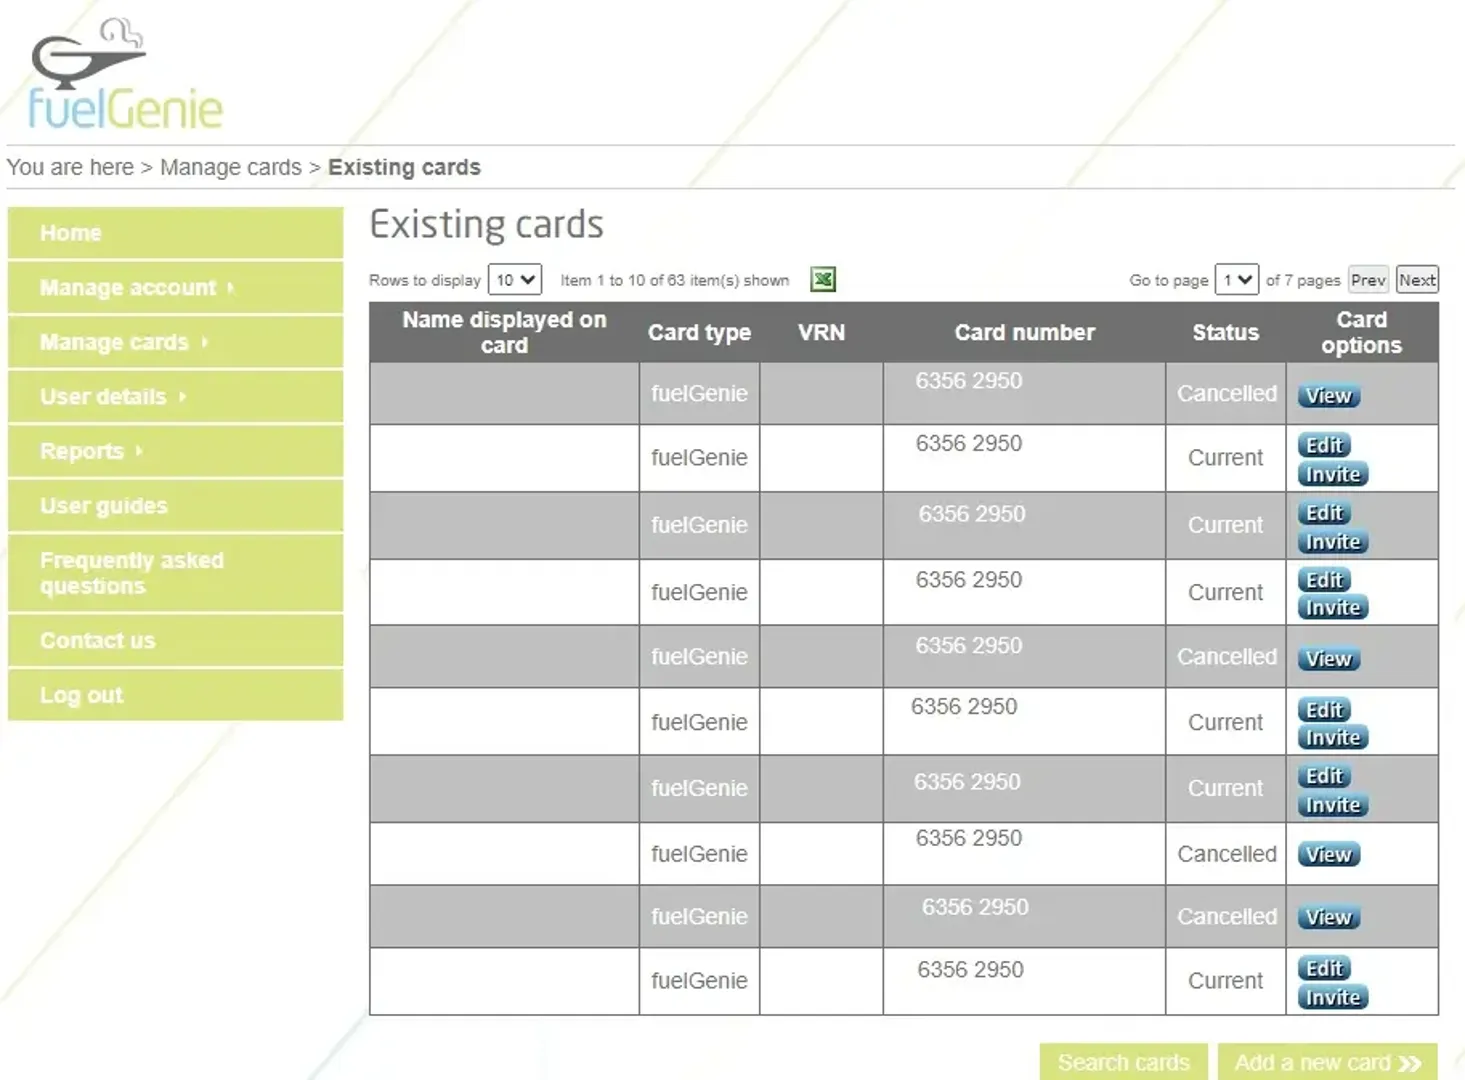
2. Hover “Manage cards” and select existing cards.
Here you will be able to see all of the cards, current and cancelled that are associated with your account.

3. It’s really simple to edit any of these cards, click “edit” next to the card you want to change.
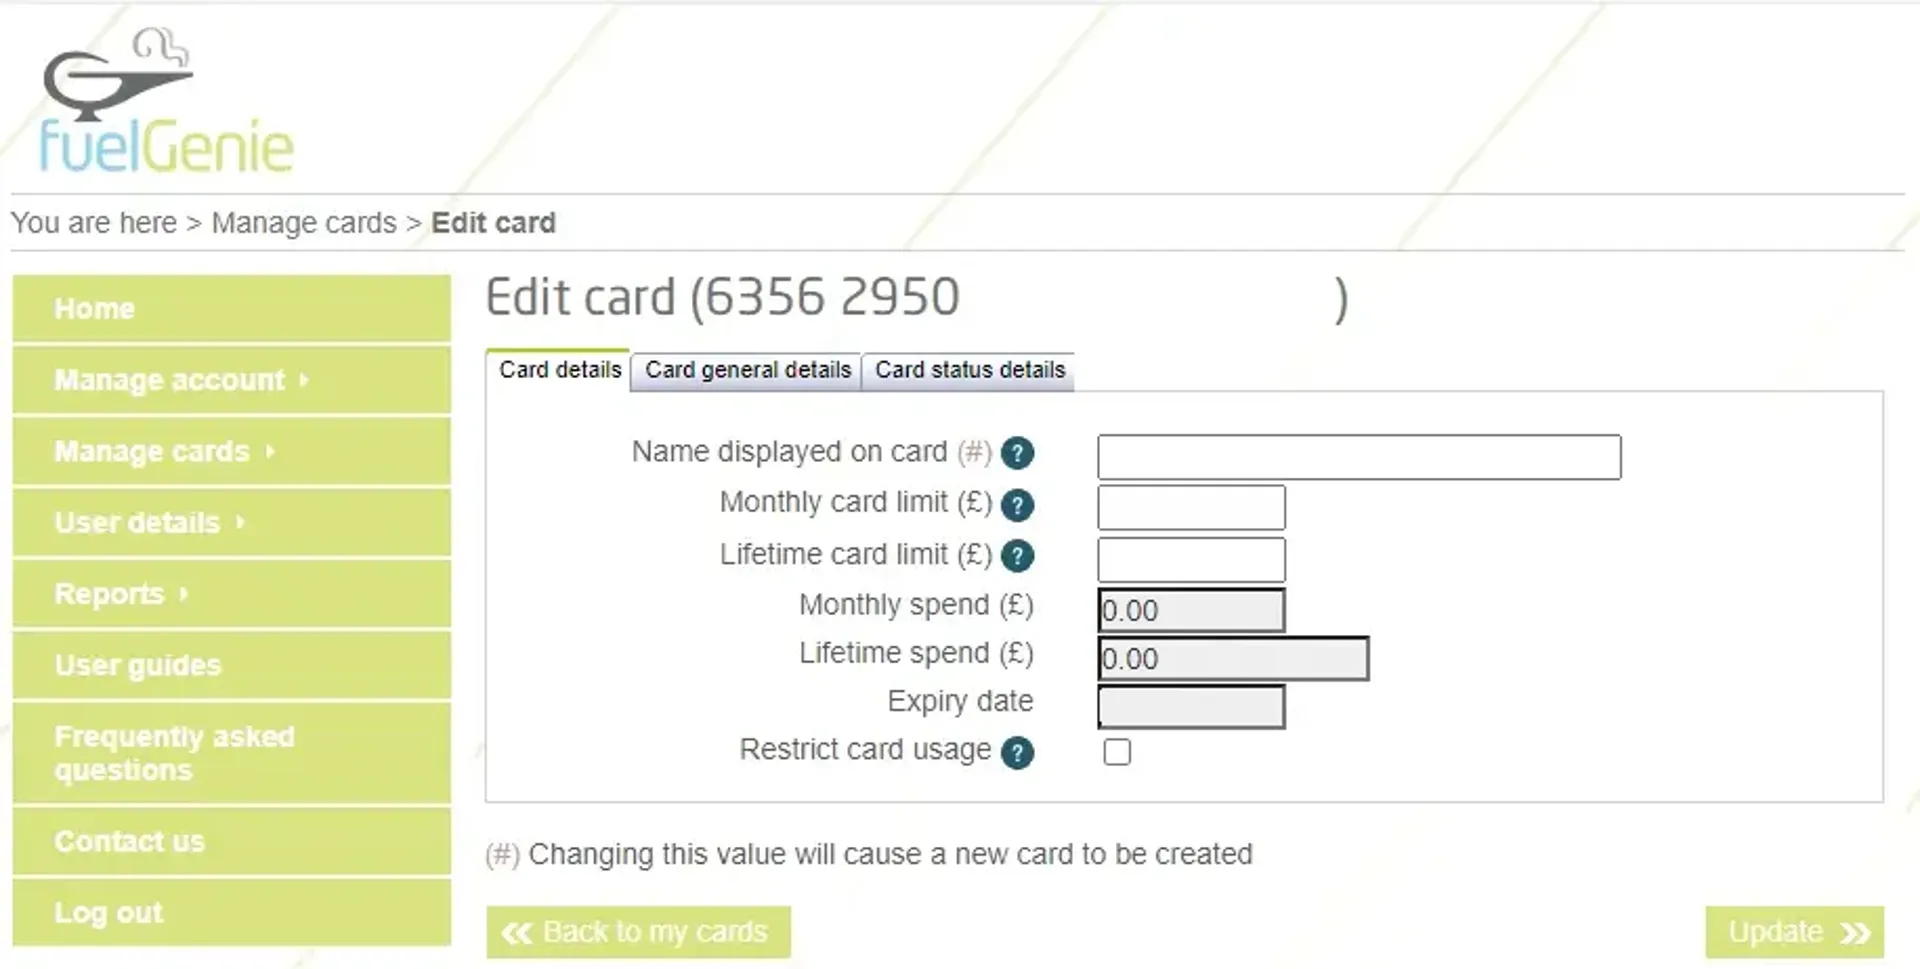
From this screen you will be able to edit all of your card details including the name, card limit and the vehicle registration number (VRN) associated with that card.
Helpful Hint - Make sure you click on all three tabs at the top to access all of the details you can edit on each card.

4. To update the vehicle registration number (VRN) click on the “Card general details” tab and type in the correct VRN you would like to associate with that fuelGenie card.
5. Once you’ve updated all of your details Click “Update” so all of your changes are successfully saved.
6. Your details have now been successfully updated online; you will receive your updated fuelGenie card in the post.
If you have altered any of the details marked with a pink (#) next to the field you will receive an updated fuelGenie card in the post.
Need a card not associated with a person or vehicle?
If you need a blank card that multiple people can use with multiple vehicles called a “pool card” you can easily order one for free online. Simply log on to manage your account here and follow the instructions below to order one.
1. Hover over manage cards on the side menu and select “Add a new card”
2. Fill in the details on “Card details” tab
3. Make sure to click on the “Card general details” tab and tick the box next to “Is this a pool card?”
4. Once you’ve filled in all of your details click “Add this new card”
Hey presto! Your new pool card will be with you in a few days.


